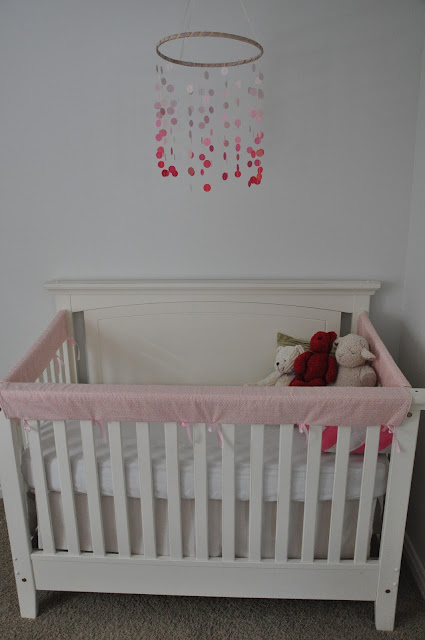
So, are you ready to drown in pink? Every time I walk past the nursery I smile - I love all the bright happy colors, and of course, all the pink!
Many details went into this room, but I have to say I'm really happy with the end result. I started with three paint swatches, a watermelon pink, soft pink, and coral, and made that my palate from which all the projects stemmed. Here's a list of the projects:
mobile
cloth crib rail guards
baby quilt
hair bow holder
painting a feature wall
painting picture frames [that will hold pics of baby girl once she arrives]
painting shelf
custom painting of giraffes [made by my awesomely talented sister]
All these elements came together, along with items I already had [crib, chair, table, lamp, family blessing dresses, paper lanterns and tissue paper pompoms from a baby shower I co-hosted, my old stuffed animals, and a sweet book from my Aunt and Uncle for baby girl] to create a soft and sweet room for a baby girl whom is loved beyond measure already. 35 weeks...the countdown is on...and we're finally feeling ready. Did I mention I even washed her clothes? Yeah, these braxton hicks have me doing things a little earlier this time ha!


I love it!!! Did you make that quilt? It's absolutely gorgeous!!!
ReplyDeleteCan't wait to meet your baby girl:)
Fernanda
Thanks Fernanda! Yes, I made the quilt - I made one for each of the boys, and this girlie is not being left out :)
DeleteI'm so very excited for your family's new addition!! Her room is so beautiful & will be filled with so much love :)
ReplyDeleteWe are soooo excited Janice! Can't wait to introduce her to the whole family!
DeleteI love it and love the pink! I need a girl! Do you have a pattern for the cloth crib guard rail? I need that. C keeps biting his!
ReplyDeleteCrib guard rails were a must for us too - the rail was chewed by two big boys before this girl has even set eyes on her bed haha! I don't have a pattern for the crib guards, but it was pretty simple and easy to whip up. Simply measure your crib rail, and cut two pieces of fabric (I used fleece on the bottom and flannelette on top) to size with added room for seam allowance. Then pin them right sides together and lay them over your crib rails to figure out placement of your ties. I did a tie at each end, then four more (total of 6) on the front and two more (total of 4) on the sides. Pin your ties in place making sure your ties are laying inward, so that when your fabric is sewn together and turned right side out the ties will be useable. Now just sew it all together, reinforcing the seam over each tie, and leaving an opening through which to turn the crib guard right side out. Once you've turned it out, poke out the corners, then stich the hole closed. I top stitches the sides of each crib guard as well, just for added measure.
DeleteDoes that make sense? If it doesn't let me know and I'll send you the link for the tutorial that gave me the idea to make them. You can buy plastic ones, but cloth is just so much cuter!
Thanks so much for sharing your post at our linky party this week!
ReplyDeleteBeautiful reveal! I love the hair bow holder.
xo
Wow thank you Shelley!! That's a very sweet comment coming from a DIY queen like yourself!
Delete